Wednesday, September 30, 2020

Pickled Ginger (Gari)


First time making this! I followed the recipe from Just One Cookbook. It was easy (even for me).  You're supposed to use young ginger . . . da kine with the pink tips, but I'd probably never get to making this if I waited until I found young ginger, so I used regular ginger.

The taste was gooooood.  I woulda liked a more supple texture, but I'm sure young ginger would've made the difference there.  I'll keep looking. 
IMG_5495

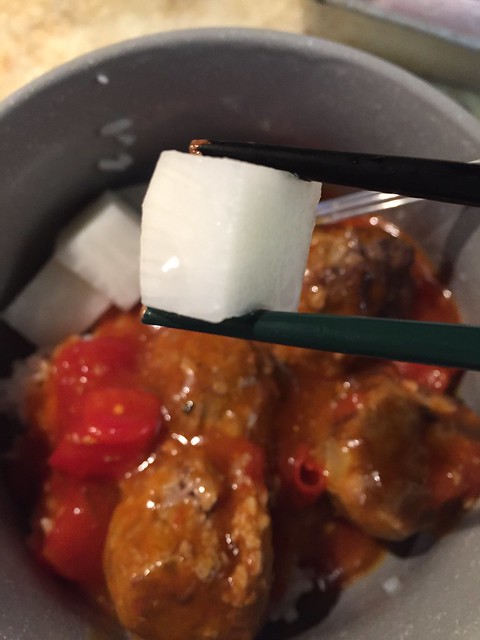
I used this much ginger and a mandoline slicer to slice. I was surprised at how easy it was to scrape off the skin with a spoon.  
IMG_5481

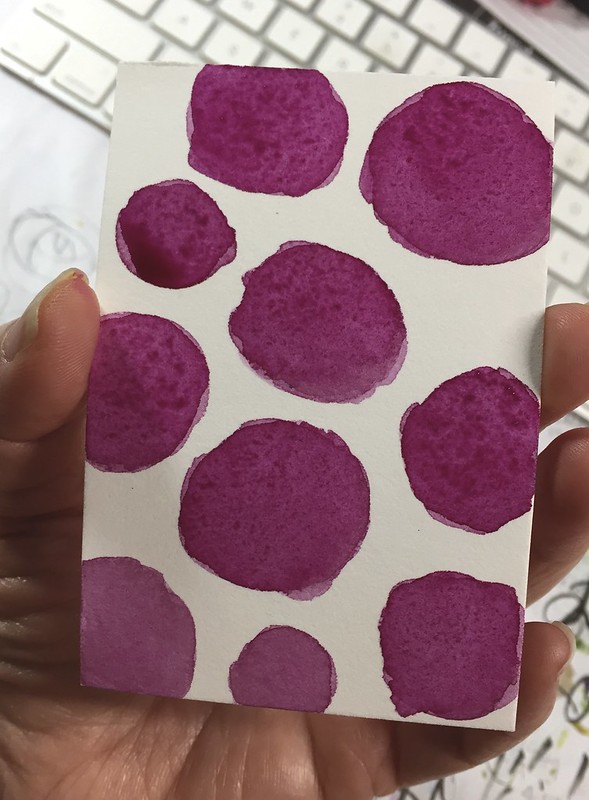
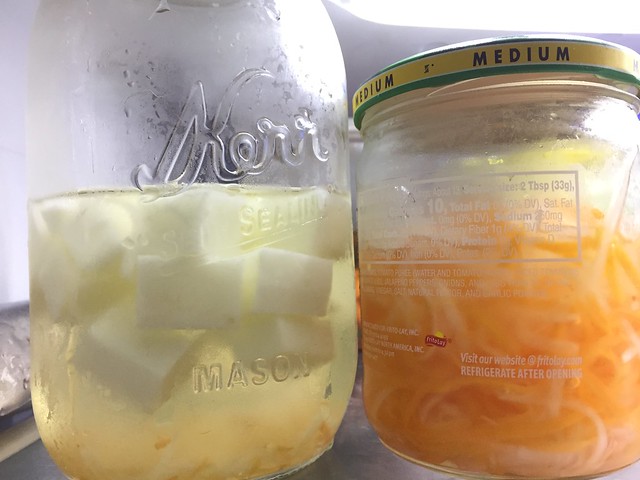
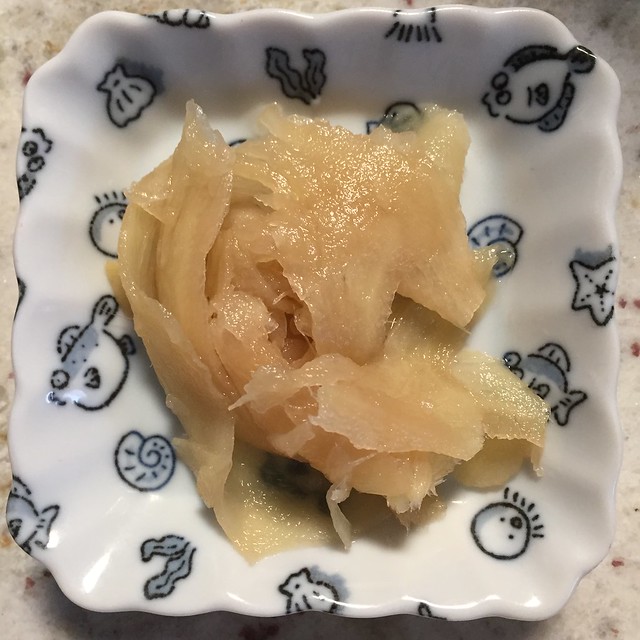
This is how much it made.
IMG_5492


INGREDIENTS

  • 3.5-5 oz young ginger (100-150 g)
  • ½ tsp kosher/sea salt

SWEET VINEGAR (AMAZU)

  • 100 ml rice vinegar (½ cup minus 1 Tbsp)
  • 4 Tbsp sugar (45 g)
  • ½ tsp kosher/sea salt 

INSTRUCTIONS

  1. Gather all the ingredients.

  2. Using a spoon, scrape off brown spots. Then thinly slice with a peeler.
  3. Sprinkle ½ tsp. Kosher salt and set aside for 5 minutes. Then add the ginger into a boiling water and cook for 1-3 minutes. If you want to keep it spicy, take it out around 1 minute. Otherwise, 2-3 minutes is good.
  4. Drain the ginger slices over a sieve and then spread them out in a single layer. With your clean hands, squeeze the water out and put them in a sterilized jar or Mason jar.
  5. In a small pot, add 100 ml (½ cup minus 1 Tbsp) rice vinegar, 4 Tbsp sugar, and ½ tsp Kosher salt. Bring it to a boil till strong vinegar smell has evaporated, roughly 1 minute. Remove from the heat and let cool slightly. Pour the vinegar mixture into the jar with sliced ginger. Close the lid, let cool and refrigerate.
  6. Several hours later (minimum 3-4 hours), the ginger will turn slightly pink. The following day it will be even more pink. The pickled ginger can be stored in an airtight container in the refrigerator for up to 1 year.

Tuesday, September 29, 2020

Sliding Knot Mask Earloop


I stopped sewing masks awhile back, but I wanted to share with you this method of doing the ear loops. It's Landon's favorite. He's asked me to change all of his masks to this type of loop. I used spare shoe laces.

IMG_5454

Here's a tutorial on how to do the sliding knot.

Monday, September 28, 2020

Coliro Pearl Watercolor Paint


I'd been wanting to try the Coliro pearlescent paints for awhile after hearing recommendations on YouTube, but at $25 for a 6-color set I thought it was just too expensive. 

The other day I noticed this 12-color set on Amazon for the same price so I decided to take the plunge.

IMG_5424

Here's a test swatch that I did.  Each pan is tinier than I expected which probably accounts for the "deal" price, but a little does go a long way. There is good coverage, and it's very shimmery.  I like it a lot.  I'm thinking of maybe doing a bunch of dragonfly greeting cards with it.
IMG_5422

Sunday, September 27, 2020

Wendell's Beijing Beef


Wendell made this for last night's dinner, and it was so, so good!  The recipe is from Seonkyoung Longest's site.  He added broccoli and used sherry instead of wine. 

IMG_5451


  • Beef
  • 1 lb beef (chuck or try tip), sliced 1/8” thin bite sizes
  • 1 tbsp soy sauce 
  • 1 tbsp shoaxing wine
  • pinch of black pepper

  • Sauce
  • 2 tbsp oyster sauce
  • 2 tbsp vinegar
  • 2 tbsp ketchup
  • 2 tbsp sugar
  • 2 to 3 tsp sambal

  • Frying & Stir Frying
  • 1/2 cup potato starch or corn starch
  • 1/2 to 2/3 cup frying oil
  • 5 to 7 cloves garlic, chopped
  • 1/4 onion, diced
  • 1/4 red bell pepper, diced

  1. Combine beef, soy sauce, shaoxing wine and black pepper in a mixing bowl and marinate while preparing other ingredients.
  2. Combine all ingredients for sauce in a mixing bowl and set aside. 
  3. Preheat frying oil to 350°F in a wok or a large skillet. (If you are using cast iron wok/pan, just heat them over medium heat)
     Dust marinated beef with starch evenly. Now, carefully add beef into frying oil one by one. Fry beef 6 to 7 minutes or until brown and crispy. Remove Remove beef from frying oil and place on a baking pan lined with cooling rack. Do batches as needed.
  4. Turn off heat. Remove most of the frying oil from wok, leave 2 tbsp oil for stir frying. You can keep used oil for later use, for stir frying or make this recipe again!
  5. Turn on heat to medium if you are using cast iron wok/pan or high heat if it’s regular wok or skillet. Add garlic, onion and red bell pepper. Stir fry them for 1 minute then pour sauce mixture. Let sauce boil, for 30 seconds, then add fried beef. Toss everything together and it’s read to serve!

Saturday, September 26, 2020

Wendell's Soy Ginger Salmon


Wendell made this a couple of nights ago.  He said that the recipe came from the Crave section in the Star Advertiser, but all I have is a photo that he took of the recipe. It says that the recipe is adapted from "The Ohana Grill Cookbook". 

It calls for maple syrup and turned out very moist and ono.

IMG_5391

I ate it on tofu with choke furikake . . . healthy and not so healthy. 
IMG_5394


4 (1/2 pound) salmon fillets
sesame seeds and furikake for garnish (optional)

Marinade:
1/4 cup reduced-sodium shoyu
1/4 cup maple syrup
3 tablespoons olive oil
2 teaspoons minced garlic
1 teaspoon minced ginger

Whisk marinade ingredients together.  Reserve 1/4 cup marinade in refrigerator.

Place fish in zip-loc bag or a container. Add marinade and refrigerate at least 1 hour or preferably overnight.

Heat a clean and oiled grill to medium-high. Remove fillets from marinade and place skin side down on grate.  Grill about 9 minutes, basting with reserved marinade.

Garnish with sesame seeds and furikake, if desired.  Serves 4. 

Friday, September 25, 2020

Layered Rose Drawing


Here's my tutorial showing how to do yesterday's rose drawing. Grab your pencil and paper!

After you draw your circle, draw a curve like this one marked in red.

IMG_5395

Starting at the halfway point of the previous curve draw a similar curve like this.
IMG_5396

Same thing for the next curve.
IMG_5397

One more time.
IMG_5398

This is the last curve that completes the first layer. If your final curve doesn't exactly meet up with the first, it's okay; just extend the first one to meet like I did here. 
IMG_5399

For the second layer your initial curved line should start in the middle of a section like this.
IMG_5401

It will look something like this.  It doesn't really matter where your curve ends.
IMG_5402

Like before, your next curve starts at the middle of the previous.
IMG_5403

Repeat.
IMG_5404

Again
IMG_5406

Once more and this completes your second layer. 
IMG_5407

To complete the inside of the flower, continue on in the same way as before.
IMG_5408

IMG_5410

IMG_5411

If you made it this far, congratulations!!  I'm so happy!
IMG_5412

This is the fineliner that I used to draw in the lines for yesterday's artwork.
IMG_5413

Thursday, September 24, 2020

Easy Watercolor Flowers


Here's something for you to try next time you're bored. You can use markers instead of watercolor paint.

First, do this.

IMG_5376

Next, add leaves.
IMG_5379

Last, do this.  Easy, yah.
IMG_5389

Wednesday, September 23, 2020

Brown Sugar Boba Ice Cream Bar


My sisters talked about this in a group text and said how popular it was.  I had never heard of it before.  Has anyone tried it?

Tuesday, September 22, 2020

Dd's Pork Chorizo Breakfast Sausage


pork sausage

Pork Chorizo Breakfast Sausage


1 lb. ground pork

½ lb. Mexican chorizo

1 tsp. Hungarian paprika

1 tsp. apple cider vinegar

½ tsp. black pepper

½ tsp. salt

½ tsp. garlic powder

½ tsp. onion powder

½ tsp. ground cumin

Pinch red pepper flakes


In a mixing bowl; combine all ingredients well. Refrigerate 30 minutes. Shape into desired size patties.  

In a skillet over medium heat, brown patties. Makes 8 patties.

Monday, September 21, 2020

On Da Desk


I ordered these sample-sized watercolor paper variety packs awhile back from Amazon. The packs included thick, smooth and rough varieties. I was most interested in trying their new black watercolor paper which was supposed to be included, but those were left out for some reason. I was a bit disappointed and I left a review saying so, but I liked the paper so kept them anyway.

IMG_5283

Here's what I've been using them for recently.
IMG_5354

Sunday, September 20, 2020

Avoiding Bitter Green Tea


This info came from the Free Your Tea site. I thought it was helpful and very useful as a blog filler.


1. Water That is Too Hot Can Make Green Tea Bitter

Before the water even hits the tea leaves, it’s possible that you’re already doing yourself a disservice depending on how you’ve heated your water.  This can make your cup of green tea taste bitter.  Green teas are more delicate than other varieties and typically need to steep at no higher than 175 F/80 C for the best results. Free Your Tea teas has precise recommended brewing temperatures to help you get it right.  This temperature will bring out the grassy, natural flavors in the tea without overpowering your taste buds. There are a few ways to achieve the perfect temperature when heating water, but we prefer a temperature controlled kettle to do the work for us.  You can also boil water and let it sit for about two minutes before adding to the tea, or mix in some cold water.

 2. Using Too Much Tea Can Make Green Tea Taste Bitter

 Secondly, it can be difficult to judge exactly how much tea leaves need to go into your cup.  This is made especially difficult when someone at your office steals your trusty mug and you’re left with an unfamiliar, tiny teacup.  Green tea leaves vary just as much by size which can impact proper measurement. Nevertheless, we recommend approximately one teaspoon of tea to one teacup of water. If using a big mug, you need more tea. If the tea leaves are larger so half your spoon is air, you need more tea.

 3. Steeping for Too Long Can Make Green Tea Taste Bitter

 After you’ve added the tea leaves to your precisely heated water, the process doesn’t end there.  Steeping for more than five minutes can over-saturate your cup of green tea and result in the much-dreaded bitterness.  We advise steeping green tea for 3-5 minutes before completely removing the infuser or straining the leaves. We like asking our mobile phone to set a timer to alert us when our tea is done.  Tea never gets better after 5 minutes, only worse.  

 4. Old or Poor Quality Tea Can Make Green Tea Taste Bitter

 Finally, and possibly most importantly, with all the impeccable green tea in the world from tea gardens in places like Darjeeling and Fujian, why drink bad tea? Lower quality bagged teas that you find in the grocery store are more likely to yield a bitter cuppa.  Even loose leaf tea that is improperly stored or old can take a turn for the worse.  


Saturday, September 19, 2020

Tsuru Ton Tan


We got dinner from Tsuru Ton Tan in Waikiki yesterday.  Wendell wanted to try their food mostly because he had read that all of the to-go items were half off (a man after my own heart). 

Parking is at the Royal Hawaiian Center, third level in one of the conveniently designated Park and Go stalls.  The restaurant is on the same level.  No need catch the elevator.  The walkway is to the right of the elevators. Just walk straight across and you're there in less than a minute. You have 20 minutes grace to pick up your food and go.  It was really easy.  Waikiki is dead so no traffic, no people.


IMG_5322

Before you go on to my food photos, try study the menu.  Each set comes with a full serving of udon. The udon comes with your choice of four types of broth . . . kake means plain and hiyashi is cold. You can add toppings and you can upgrade. Okay, now you may proceed.
Screen Shot 2020-09-18 at 3.35.05 PM

This is the Sushi Roll Set ($18).
IMG_5336

This is the Nigiri Sushi Set ($20).
IMG_5339

Tonkatsu Bento Set ($12)
IMG_5335

Shrimp Tempura Set Topping ($4)
IMG_5341

Upgrade to Curry Deluxe Udon ($5)
IMG_5344

This plus the next picture is the upgrade to Ontama Toriten Udon ($3) which includes egg and . . . 
IMG_5347

tempura-fried chicken.
IMG_5342

Here are the broths, top is kake, left is cream (with added beef topping $3) and right is curry.
IMG_5350

Everything was good although maybe we shoulda heated up the hot items. 

Friday, September 18, 2020

Wendell's Coleslaw


Wendell made this last night.  I'm not too much into coleslaw, but when Landon said, "Oh, good coleslaw!", it suddenly became blog worthy. The recipe is from Inspired Taste site and is called "Seriously Good Homemade Coleslaw".


IMG_5320


1 medium cabbage (about 2 pounds), outer leaves removed

3 medium carrots, peeled and shredded

1/2 cup loosely packed fresh parsley leaves, coarsely chopped

1 cup (170 grams) mayonnaise

2 tablespoons apple cider vinegar or more to taste

2 tablespoons Dijon mustard or coarse ground mustard

1 teaspoon celery seeds

1/4 teaspoon fine sea salt or more to taste

1/4 teaspoon fresh ground black pepper or more to taste


    Quarter the cabbage through the core, and then cut out the core. Cut each quarter crosswise in half and finely shred. Place the shredded cabbage in a very large bowl (you will have 6 to 8 cups).

    Add the shredded carrot and parsley to the cabbage and toss to mix.

    In a separate bowl, stir the mayonnaise, vinegar, mustard, celery seeds, salt, and pepper together. Taste for acidity and seasoning then adjust as desired. Pour two-thirds of the dressing over the cabbage and carrot then mix well. (Clean hands are the quickest tool).

    If the coleslaw seems dry, add a little more of the dressing. Eat right away or let it sit in the refrigerator for about an hour to let the flavors mingle and the cabbage to soften.


Thursday, September 17, 2020

Dd's Mapo Tofu


When Didi shared this photo with us I remarked on how it was so innovative of her to serve the dish on noodles. She was puzzled and asked, "Why? How do you eat it?" 

I always thought it was a given that you eat Mapo Tofu with rice. No?

mapo


Mapo Tofu

½ (20 oz.) block tofu, 1-inch cubes, drain well

2 TB vegetable oil

½ lb. ground pork, chicken or turkey

2 tsp. ginger, minced

2 tsp. garlic, minced

3 stalks green onion, white and green parts separated, chopped


Sauce:


1 ½ TB doubanjiang (Korean bean paste)

1 c. chicken broth

½ c. water

2 TB mirin

1 TB chilie garlic paste

1 TB red miso

1 TB oyster sauce

1 TB soy sauce

1 tsp siracha

½ TB black beans, soaked, drained, mashed

2 tsp. cornstarch

1 tsp. sesame seed oil

3 tsp. cornstarch mixed with 3 tsp. water

In a mixing bowl; combine sauce ingredients. Set aside. In a large skillet or wok over medium high heat; brown pork in oil. 

Add ginger, garlic and white parts of green onion. Add sauce ingredients and tofu; stirring well until slightly thickened. Serve over pan fried noodles or as a ramen topping. Top with green onion. Serves 4 appetizers or 2 entrees.

Wednesday, September 16, 2020

Happy Birthday, Daddy


My dad would've been 87 years old today.


IMG_5303.JPG

Tuesday, September 15, 2020

Monday, September 14, 2020

Unstopables


Do you use this?  It might be an extravagance because all it does is make your clothes smell good. But I like it a lot.


Sunday, September 13, 2020

Pickled Daikon


I cut up left over daikon and threw them in the pickling liquid from when I made that daikon/carrot thing.

IMG_5277

Came out good! 
IMG_5273

Saturday, September 12, 2020

Dd's Mahi Mahi Beurre Blanc


mahimahi


MAHI MAHI BEURRE BLANC


Beurre Blanc:

1 TB shallots, minced

½ c white wine

1 tsp ground sage

2 TB heavy cream

3 TB butter, cold, in teaspoon sized pieces


Mahi:

2-6 oz. pieces fresh mahi

Salt, freshly ground white pepper

flour, as needed

1 egg, beaten


Beurre Blanc: In a skillet over medium heat; sauté shallots in wine and sage until wine has evaporated completely 5-7 minutes. 


Reduce heat to medium-low. Add cream. Stir in butter a little at a time until fully incorporated. Keep warm.


Mahi: generously season mahi filets. In 2 separate shallow dishes, place, flour and beaten egg. Dredge mahi in flour and then egg. In a skillet over medium heat; sauté/brown mahi until cooked through. For service; top with Beurre Blanc, Serves 2.

Friday, September 11, 2020

Jimmy Dean Breakfast Bowl


Wendell said that he'd been wanting to get this for awhile, and since Costco has it for $4.50 off now he decided to get it. Regular price is $14.49. The box contains 8 bowls. 

IMG_5255

The serving per bowl was kinda chintzy, but the taste was good. 
IMG_5260

Is this bad?  Not sure.  I forget already.
IMG_5256